Zoraxy: Reverse Proxy + Let's Encrypt SSL in 10 Minutes
Deploy Zoraxy to expose all your Docker services via HTTPS with Let's Encrypt in 10 minutes. Intuitive web interface, no config files to edit.
Zoraxy is the modern open-source reverse proxy I use to expose all my services to the internet. In 10 minutes, you'll have automatic Let's Encrypt HTTPS for all your Docker services, without complex Nginx configuration. A true game changer for the homelab.
What is a Reverse Proxy and Why Zoraxy?
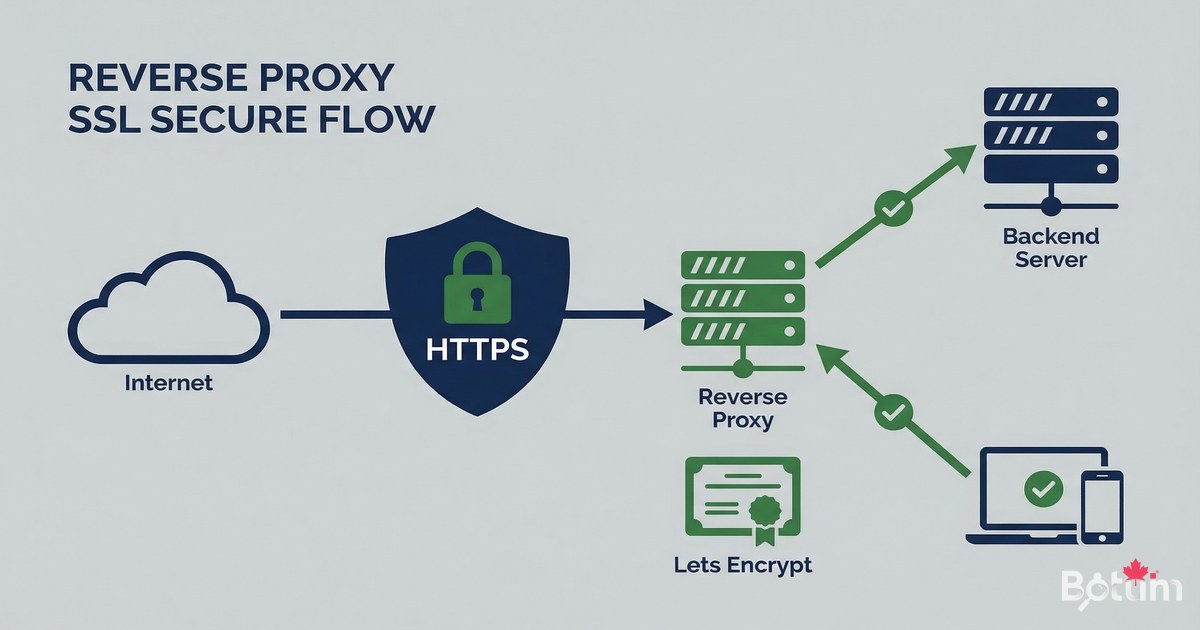
A reverse proxy is a server that receives incoming requests (port 80/443) and redirects them to the right internal service. Instead of exposing each service on a different port (my-app:8080, my-other-app:3000), you have a single secure HTTPS entry point per subdomain.
- Single port 443 open — all services behind HTTPS
- Automatic free Let's Encrypt SSL certificates
- Simple web interface — no config files to edit
- Cloudflare DNS challenge support for wildcard certificates
- Real-time rule management without restarts
- Open source — github.com/tobychui/zoraxy
- Lightweight alternative to Nginx Proxy Manager or Traefik
Prerequisites
Before deploying Zoraxy, make sure you have:
- Docker and Docker Compose installed (see article 4)
- A domain name with DNS access (Cloudflare recommended)
- Ports 80 and 443 open in your firewall/router
- At least one subdomain pointing to your public IP
- Static public IP or DDNS service (DuckDNS, Cloudflare)
Deploy Zoraxy with Docker
Create a working directory and the docker-compose.yml file for Zoraxy:
mkdir -p ~/docker/zoraxy && cd ~/docker/zoraxy

cat > docker-compose.yml << 'EOF'
version: '3.8'

services:
  zoraxy:
    image: tobychui/zoraxy:latest
    container_name: zoraxy
    restart: unless-stopped
    ports:
      - "80:80"
      - "443:443"
      - "8443:8443"    # Admin interface (generic port)
    volumes:
      - ./data:/opt/zoraxy/data
      - /etc/localtime:/etc/localtime:ro
    environment:
      - NOAUTH=false    # Authentication enabled
    cap_add:
      - NET_ADMIN
EOF

# Start Zoraxy
docker compose up -d
docker logs -f zoraxy
Wait a few seconds for Zoraxy to start, then access the admin interface at: https://your-ip:8443 (or the port you configured). On first access, create an administrator account.
Cloudflare DNS Configuration
For Let's Encrypt to issue certificates, your subdomains must point to your public IP. In Cloudflare:
# In Cloudflare Dashboard > DNS > Records:
# Add an A record for each subdomain:

Type: A
Name: my-service           # e.g.: vault, kuma, portainer
Content: your-public-IP    # Your public IP
Proxy status: Proxied (orange) — or DNS only (grey) depending on setup
TTL: Auto

# If using DDNS:
# Type: CNAME
# Name: *
# Content: yourdomain.duckdns.org (or your DDNS)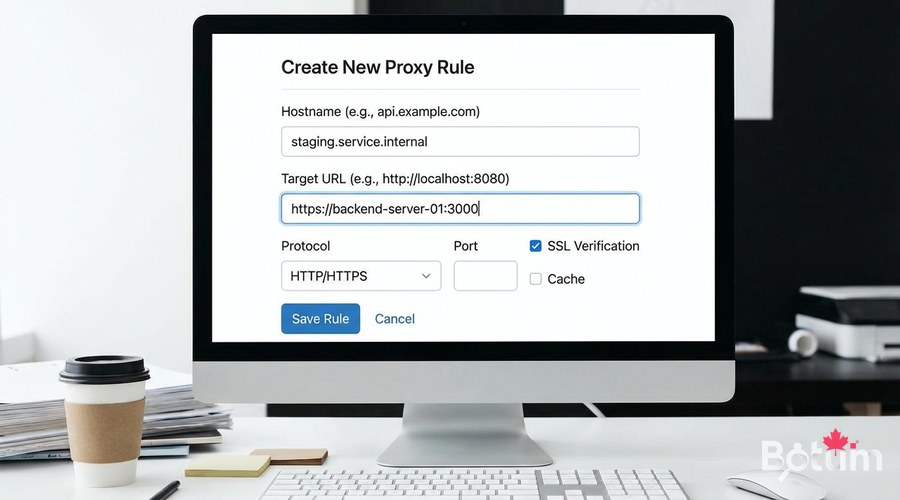
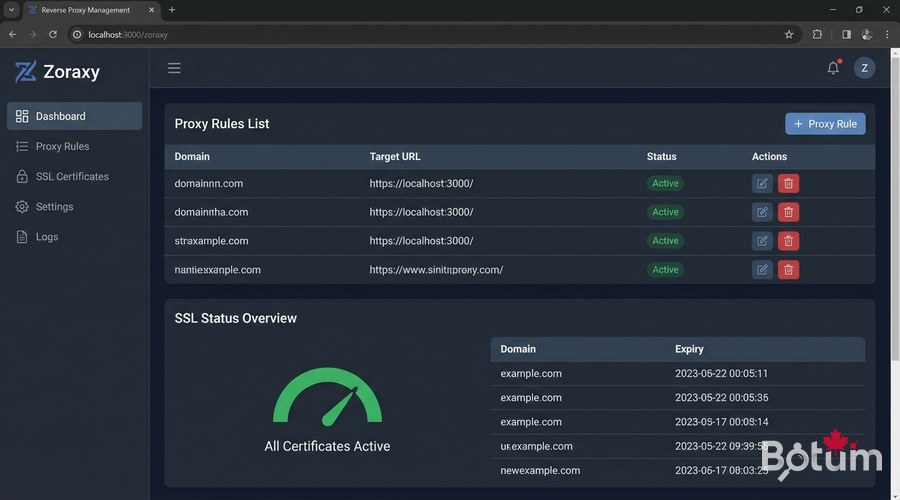
Add a Proxy Rule
In the Zoraxy interface, navigate to 'Proxy Rules' > 'Create Proxy Rule':
- Matching Hostname: my-service.yourdomain.com
- Target: http://YOUR-VM-IP:8080 (internal service port)
- Proxy Type: Subdomain (recommended for most services)
- Enable: ON
- Save
# Common proxy rule examples:
# Service         Hostname                     Target
# Ghost Blog      blog.example.com         ->  localhost:2368
# Vaultwarden     vault.example.com        ->  localhost:8888
# Uptime Kuma     status.example.com       ->  localhost:3000
# Portainer       portainer.example.com    ->  localhost:9000
# Grafana         grafana.example.com      ->  localhost:3001

# Note: use the internal server IP or Docker container name
# if Zoraxy is on the same Docker network as the services
Enable HTTPS Let's Encrypt
This is where Zoraxy shines — getting an SSL certificate in one click. After creating the proxy rule, click 'SSL Certificate' for this domain:
- Certificate Provider: Let's Encrypt
- Domain: my-service.yourdomain.com
- Email: your-email@example.com (for Let's Encrypt alerts)
- Click 'Get Certificate'
- Zoraxy automatically manages renewal
# Verify the certificate is valid:
curl -I https://my-service.yourdomain.com

# Wait 30-60 seconds for Let's Encrypt to
# validate the HTTP-01 challenge and issue the certificate.

# If you get 'too many certificates' error:
# Use Let's Encrypt staging mode for testing.
# Or wait 7 days (limit: 50 certs/domain/week)
Cloudflare as an Additional Security Layer
By enabling the Cloudflare proxy (orange icon), your real IP is hidden behind Cloudflare. This provides DDoS protection and automatic caching. However, for Let's Encrypt challenges, you may need to use the Cloudflare DNS challenge instead of HTTP challenge.
# If Cloudflare proxy is enabled (orange),
# the HTTP-01 challenge may fail.
# Solutions:
# 1. Temporarily disable the proxy (grey) during certificate issuance
# 2. Use DNS challenge with the Cloudflare API

# DNS challenge configuration in Zoraxy:
# SSL > Certificate > Provider: Let's Encrypt DNS
# Provider: Cloudflare
# API Token: your-cloudflare-zone-dns-edit-token
# (Create in Cloudflare > My Profile > API Tokens)
Securing the Admin Interface
The Zoraxy admin interface should not be publicly exposed. Recommended security measures:
- Do not create a proxy rule for the Zoraxy admin interface
- Access only via VPN or local network
- Change the default admin port
- Enable strong authentication (solid password)
- Restrict access by IP in Zoraxy if possible
Maintenance and Updates
# Update Zoraxy
cd ~/docker/zoraxy
docker compose pull
docker compose up -d

# Check logs
docker logs --tail 50 zoraxy

# Backup configuration
tar czf zoraxy-backup-$(date +%Y%m%d).tar.gz ./data/

# Check SSL certificates (expiration)
# In interface: SSL > Certificate List
Conclusion and Next Steps
Zoraxy is now operational. All your Docker services are now accessible via HTTPS with a valid Let's Encrypt certificate. In the next article, we deploy Vaultwarden — your self-hosted password manager secured by this same reverse proxy.
Download this guide as a PDF to read offline.
⬇ Download the guide (PDF)🚀 Go Further with BOTUM
This guide covers the essentials. In production, every environment has its own specifics. BOTUM teams accompany organizations through deployment, advanced configuration, and infrastructure hardening. If you have a project, let's talk.
Discuss your project →