Proxmox VE: Create Your First Ubuntu VM in 15 Minutes
Proxmox VE is the open-source hypervisor powering the BOTUM infrastructure. Learn to install Proxmox and create your first Ubuntu VM in 15 minutes with this step-by-step guide.

Proxmox VE is the open-source hypervisor I use for the entire BOTUM infrastructure. Free, powerful, and based on KVM + LXC, it lets you create virtual machines and containers from an intuitive web interface. In this guide, I'll show you how to install Proxmox and create your first Ubuntu VM in under 15 minutes.
What is Proxmox VE and Why Use It?
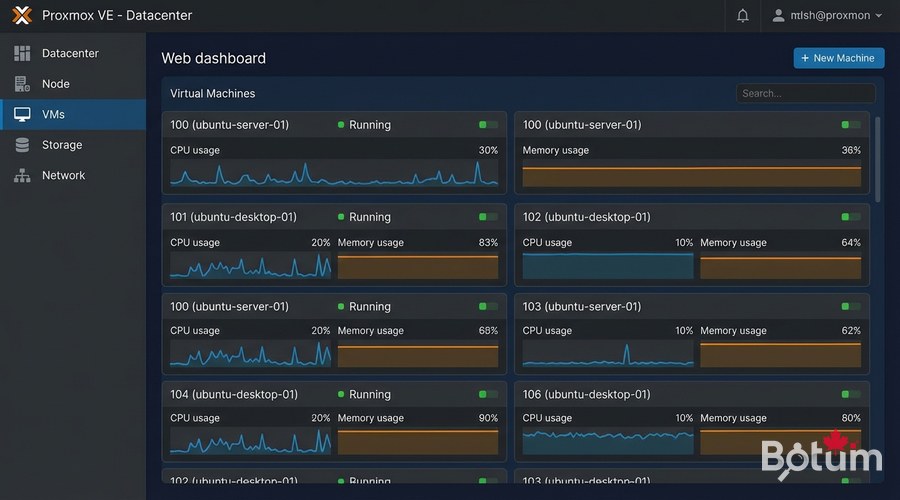
Proxmox Virtual Environment (PVE) is an open-source virtualization platform based on Debian. Unlike VMware ESXi or Hyper-V, Proxmox is completely free (with optional paid support) and offers a complete web interface to manage your VMs, LXC containers, storage, and networking from a single dashboard.
- KVM (Kernel-based Virtual Machine) for full virtual machines
- LXC (Linux Containers) for lightweight containers
- HTML5 web interface — no client to install
- Instant snapshots and clones
- Multi-node clustering (high availability)
- Integrated backup (Proxmox Backup Server compatible)
- Free for personal and professional use
Hardware and Software Prerequisites
Before installing Proxmox, verify that your hardware supports hardware virtualization:
- Intel CPU (VT-x) or AMD (AMD-V) with virtualization enabled in BIOS
- Minimum 4 GB RAM (8 GB recommended for multiple VMs)
- Dedicated disk of 32 GB minimum (SSD recommended)
- 8 GB USB drive for the installer
- Wired (Ethernet) network connection recommended
- BIOS/UEFI access to enable VT-x or AMD-V
To verify virtualization is enabled: egrep -c '(vmx|svm)' /proc/cpuinfo — a result > 0 confirms support.
Installing Proxmox VE on Bare Metal
Download the Proxmox VE ISO from proxmox.com/downloads. Create a bootable USB drive with Balena Etcher or Rufus, then boot from the USB.
# Proxmox VE installation steps:
# 1. Select "Install Proxmox VE (Graphical)"
# 2. Accept the EULA license agreement
# 3. Choose target disk (Harddisk Options)
# 4. Set localization (Country: Canada, Timezone: America/Toronto)
# 5. Set root password and admin email
# 6. Configure networking:
#    - Management Interface: your NIC (e.g., eno1)
#    - Hostname: pve.mydomain.local
#    - IP Address: 192.168.1.100/24 (adjust to your network)
#    - Gateway: 192.168.1.1
#    - DNS: 8.8.8.8
# 7. Reboot and remove USB drive
After reboot, access the web interface at https://[your-server-IP]:8006. Ignore the self-signed SSL certificate warning. Log in with root and the password set during installation.
Post-Installation Optimizations
Before creating VMs, apply some important optimizations via the Proxmox Shell (Datacenter > Node > Shell):
# 1. Disable enterprise subscription repo (if no subscription)
sed -i 's/^deb/#deb/' /etc/apt/sources.list.d/pve-enterprise.list

# 2. Add community repo (free)
echo "deb http://download.proxmox.com/debian/pve bookworm pve-no-subscription"   > /etc/apt/sources.list.d/pve-community.list

# 3. Update the system
apt update && apt dist-upgrade -y

# 4. Reboot if a new kernel is installed
reboot
Download Ubuntu Server ISO in Proxmox
In the Proxmox interface, navigate to: local (pve) > ISO Images > Download from URL
# Ubuntu Server 24.04 LTS ISO URL:
https://releases.ubuntu.com/24.04/ubuntu-24.04.2-live-server-amd64.iso

# Or via Proxmox Shell:
cd /var/lib/vz/template/iso/
wget -q https://releases.ubuntu.com/24.04/ubuntu-24.04.2-live-server-amd64.iso
# Verify SHA256:
sha256sum ubuntu-24.04.2-live-server-amd64.iso
Create Your First Ubuntu VM
Click 'Create VM' in the top right of the Proxmox interface. Follow the creation wizard with these recommended settings:
- General: Name = ubuntu-server-01, VM ID = 101
- OS: ISO = ubuntu-24.04.2-live-server-amd64.iso, Type = Linux, Version = 6.x
- System: BIOS = SeaBIOS (or OVMF for UEFI), Machine = q35, SCSI = VirtIO SCSI
- Disks: Bus = VirtIO Block, Size = 32G minimum, SSD emulation = ON
- CPU: 2 cores minimum, Type = host (best performance)
- Memory: 2048 MB minimum (4096 MB recommended)
- Network: Bridge = vmbr0, Model = VirtIO (paravirtualized)
# After creation, start the VM:
# 1. Select the VM in the left panel
# 2. Click "Start"
# 3. Open console: ">_ Console" (noVNC)
# 4. Follow normal Ubuntu Server installation

# Once Ubuntu is installed and running, get the IP:
# In the VM console:
ip a | grep "inet " | grep -v 127.0.0.1
Templates and Clones — Save Time
One of Proxmox's most powerful features is template creation. Once your Ubuntu VM is configured, convert it to a template to quickly clone new VMs:
# Via web interface:
# 1. Right-click on configured VM -> Convert to Template
# 2. To clone: Right-click on template -> Clone
#    - Mode: Full Clone (independent) or Linked Clone (shared base disk)
#    - Full Clone recommended for production

# Via Proxmox CLI (Shell):
# Create template from VM 101:
qm template 101

# Clone VM 101 to VM 200:
qm clone 101 200 --name my-new-server --full
qm start 200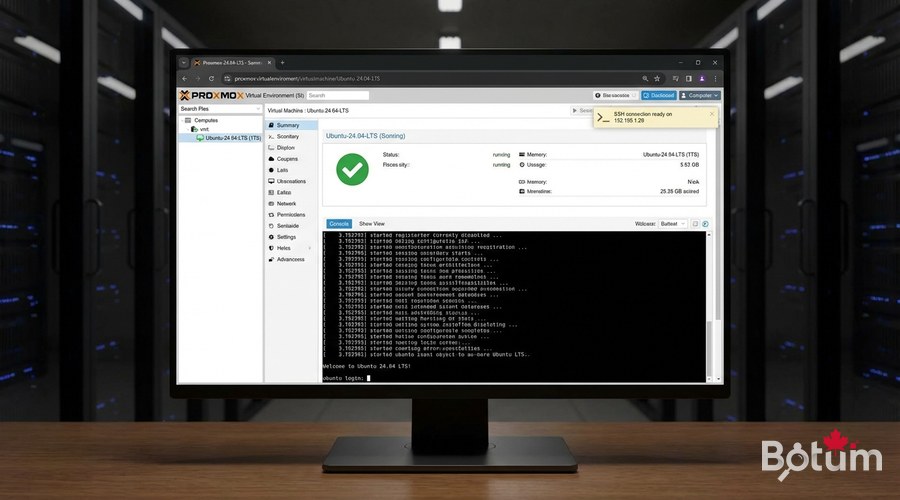
SSH Access to the VM from Your Network
Once the Ubuntu VM is started and you have its IP, connect via SSH from any machine on your local network:
# From your local machine:
ssh user@VM-IP-ADDRESS

# Example:
ssh ubuntu@192.168.1.105

# Add SSH key to avoid passwords:
ssh-keygen -t ed25519 -C "proxmox-vm@botum"
ssh-copy-id ubuntu@192.168.1.105

# Test connection:
ssh -i ~/.ssh/id_ed25519 ubuntu@192.168.1.105 'echo "Connection OK"'
Proxmox Snapshots — Save State Before Breaking Things
Proxmox snapshots let you save the complete state of a VM in seconds. Ideal before a major update or experiment:
# Via web interface:
# 1. Select VM > Snapshots > Take Snapshot
# 2. Name: before-update-2026-03
# 3. VM can stay running (live snapshot with RAM if desired)

# Via CLI:
qm snapshot 101 before-update --description "Before kernel upgrade"

# Restore a snapshot:
qm rollback 101 before-update

# List snapshots:
qm listsnapshot 101

# Delete a snapshot:
qm delsnapshot 101 before-update
Networking and Proxmox Firewall
By default, all VMs share the vmbr0 network bridge and have access to the local network. To isolate VMs or create private networks, you can create additional bridges in System > Network > Create > Linux Bridge.
- vmbr0: main network (LAN/WAN access)
- vmbr1: isolated network for DMZ or testing (optional)
- Proxmox Firewall: configurable per datacenter, node, or VM
- VLAN tagging natively supported on bridges
Conclusion and Next Steps
You now have a functional Proxmox VE hypervisor with your first Ubuntu VM. This is the foundation of the entire self-hosted infrastructure — every service we'll deploy in this series (Docker, Zoraxy, Vaultwarden, Uptime Kuma) will run in a Proxmox VM or container.
In the next article, we install Docker on this Ubuntu VM and discover the fundamentals of containerization.
Téléchargez ce guide en PDF pour le consulter hors ligne.
⬇ Télécharger le guide (PDF)🚀 Aller plus loin avec BOTUM
Ce guide couvre les bases. En production, chaque environnement a ses spécificités. Les équipes BOTUM accompagnent les organisations dans le déploiement, la configuration avancée et la sécurisation de leur infrastructure. Si vous avez un projet, parlons-en.
Discuter de votre projet →