Install OPNsense in Proxmox: A Complete Step-by-Step Guide
OPNsense VM on Proxmox from scratch: download the ISO, create the VM with VirtIO, install OPNsense, configure WAN/LAN, DHCP and the web interface — then verify NAT and DNS work. 2026 guide.

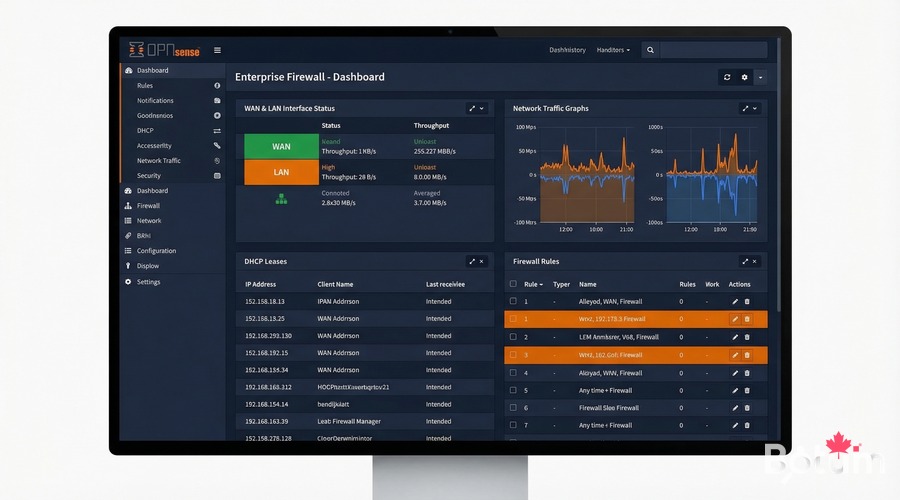
On my BOTUM infrastructure, all network filtering runs through an OPNsense VM on Proxmox. This guide covers the complete installation from scratch: ISO, VM creation, OPNsense install, WAN/LAN config, DHCP, and web interface access.
This post is part of the OPNsense Enterprise Stack series — start here if you're building from scratch.
Why OPNsense Over pfSense in 2026?
- Modern Bootstrap/Vue.js interface — pfSense sticks to an aging PHP UI.
- Native kernel WireGuard since OPNsense 21.7 — zero third-party plugins.
- Weekly transparent updates — pfSense CE moves much slower.
- Official CrowdSec plugin in Firmware > Plugins.
- Full BSD 2-Clause license — no degraded community edition.
- Full REST API for automation and CI/CD.
Proxmox Prerequisites
- CPU: 2 vCPUs min, 4 recommended
- RAM: 4 GB min, 8 GB ideal
- Storage: 32 GB SSD on local-lvm
- NICs: 2 minimum (WAN + LAN), 3 ideal
- Proxmox: 8.x (kernel 6.x)
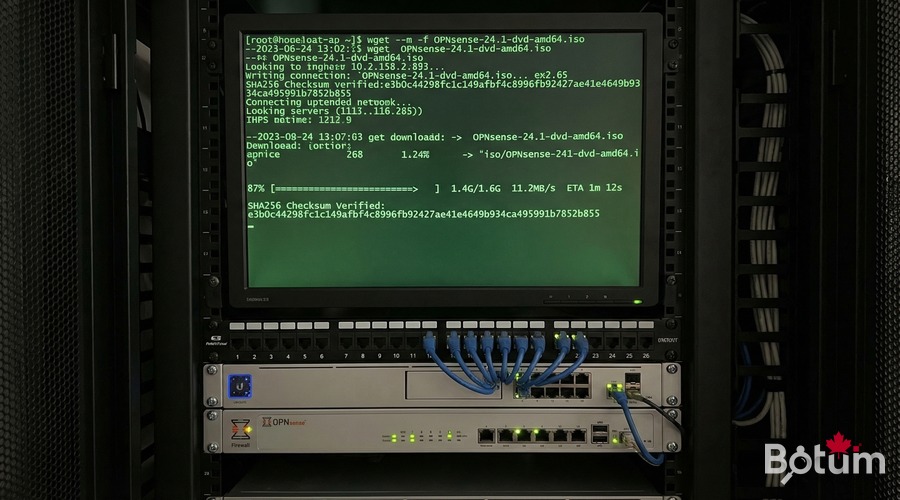
Download the OPNsense ISO
cd /var/lib/vz/template/iso/
wget https://mirror.ams1.nl.leaseweb.net/opnsense/releases/24.7/OPNsense-24.7-dvd-amd64.iso.bz2
bzip2 -d OPNsense-24.7-dvd-amd64.iso.bz2
sha256sum OPNsense-24.7-dvd-amd64.iso
Create the OPNsense VM
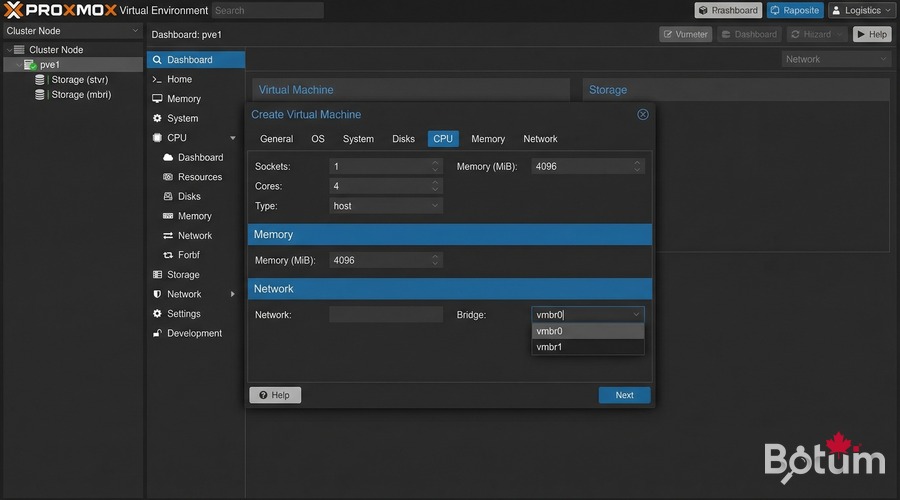
qm create 100   --name opnsense-fw   --memory 4096 --cores 2 --cpu host   --net0 virtio,bridge=vmbr0   --net1 virtio,bridge=vmbr1   --net2 virtio,bridge=vmbr2   --ide2 local:iso/OPNsense-24.7-dvd-amd64.iso,media=cdrom   --scsi0 local-lvm:32 --scsihw virtio-scsi-pci   --boot order=ide2 --ostype other
qm start 100
Always use VirtIO — 3x better throughput vs emulated Intel E1000 under BSD.
Install OPNsense Step by Step
# Console login: installer / opnsense
# Install (UFS) → vtbd0 → Entire Disk → ~3 min
# Remove ISO before reboot:
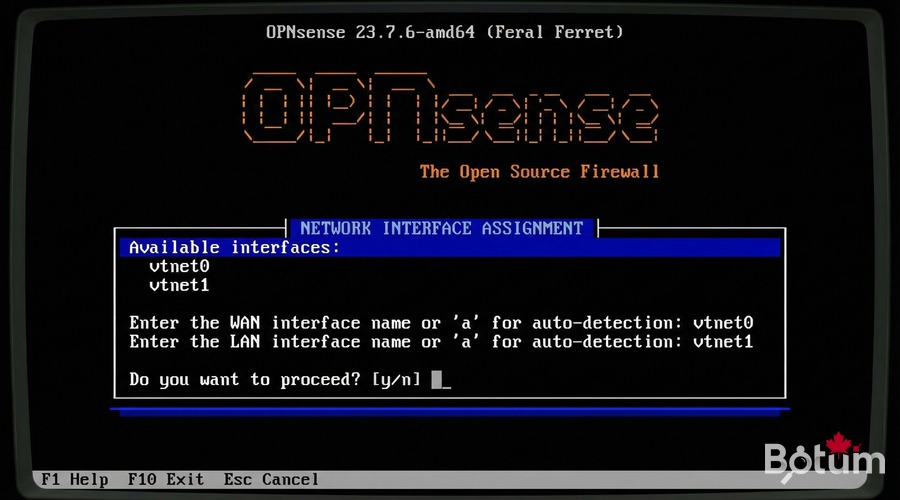
qm set 100 --ide2 none,media=cdromInitial Configuration: WAN/LAN and DHCP
# Post-boot console:
# VLANs? → N  |  WAN: vtnet0  |  LAN: vtnet1
# Set LAN IP: 192.168.1.1/24 | DHCP: 100-200
# Web UI: http://192.168.1.1  root/opnsense
Access the Admin Web Interface
Connect to vmbr1, open http://192.168.1.1. Change root password immediately.
Setup Wizard: Hostname, DNS (1.1.1.1), NTP, WAN type, new root password, apply updates.
Verify: Ping, DNS, NAT
ping 192.168.1.1    # LAN gateway OK
ping 1.1.1.1        # NAT/WAN OK
curl -s ifconfig.me # Public IP — NAT confirmed
nslookup google.com # DNS OK
What's Next
- Post 2: VLANs IoT/Work/Guest/DMZ + Zero Trust inter-VLAN rules
- Post 3: WireGuard VPN — site-to-site + remote workers
- Post 4: WiFi by VLAN — APs, segmented SSIDs
- Post 5: CrowdSec + fail2ban — collaborative IDS/IPS
- Post 6: SD-WAN with automatic LTE failover
Téléchargez ce guide en PDF pour le consulter hors ligne.
⬇ Télécharger le guide (PDF)🚀 Aller plus loin avec BOTUM
Ce guide couvre les bases. En production, chaque environnement a ses spécificités. Les équipes BOTUM accompagnent les organisations dans le déploiement, la configuration avancée et la sécurisation de leur infrastructure. Si vous avez un projet, parlons-en.
Discuter de votre projet →