Install Docker on Ubuntu: The Complete 2026 Guide
Docker Engine + Docker Compose v2 on Ubuntu 24.04 LTS — the official apt method, post-installation configuration, essential commands and production best practices.
Docker is the containerization engine powering the entire BOTUM infrastructure. In this complete 2026 guide, I'll show you how to install Docker Engine and Docker Compose v2 on Ubuntu 24.04 LTS using the official method — the only truly reliable one.
Why Docker? Key Concepts
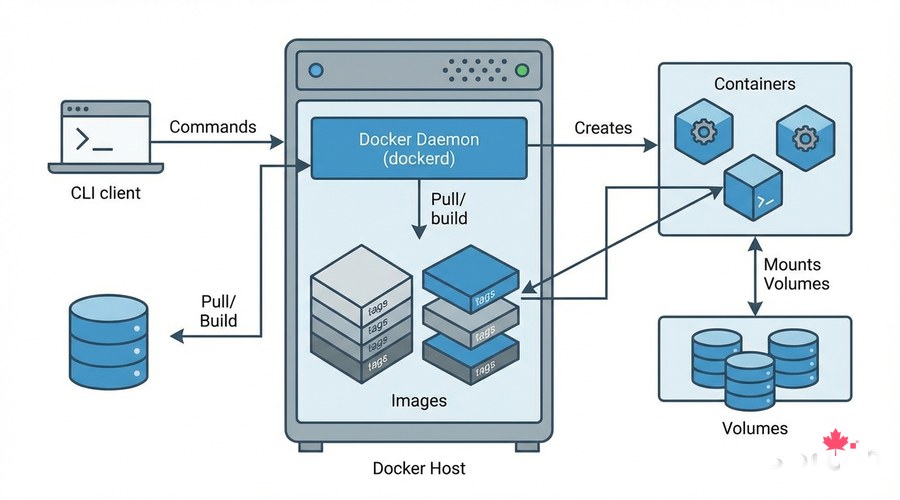
Docker is a containerization platform that packages an application and all its dependencies into a portable, isolated container. Unlike VMs that virtualize hardware, containers share the host Linux kernel — they start in seconds and consume far fewer resources.
- Docker Image: immutable snapshot of an application and its dependencies
- Container: a running instance of an image
- Docker Hub: public image registry (ghost, nginx, postgres, etc.)
- Docker Compose: multi-container orchestration via a YAML file
- Volume: persistent storage mounted in a container
- Network: virtual network between containers
Docker Engine Installation — Official apt Method
⚠️ Do not use 'snap install docker' or Docker from the default Ubuntu repo — these versions are often outdated. Use the official Docker Inc. repository:
# 1. Remove any old versions
sudo apt remove -y docker docker-engine docker.io containerd runc 2>/dev/null || true

# 2. Update and install prerequisites
sudo apt update
sudo apt install -y ca-certificates curl gnupg lsb-release

# 3. Add Docker's official GPG key
sudo install -m 0755 -d /etc/apt/keyrings
curl -fsSL https://download.docker.com/linux/ubuntu/gpg   | sudo gpg --dearmor -o /etc/apt/keyrings/docker.gpg
sudo chmod a+r /etc/apt/keyrings/docker.gpg

# 4. Add official Docker repository
echo "deb [arch=$(dpkg --print-architecture)   signed-by=/etc/apt/keyrings/docker.gpg]   https://download.docker.com/linux/ubuntu   $(. /etc/os-release && echo $VERSION_CODENAME) stable"   | sudo tee /etc/apt/sources.list.d/docker.list > /dev/null

# 5. Install Docker Engine + Docker Compose v2
sudo apt update
sudo apt install -y docker-ce docker-ce-cli containerd.io                     docker-buildx-plugin docker-compose-plugin

# 6. Verify installation
docker --version
docker compose version
sudo docker run hello-world
Post-Installation Configuration
By default, only root can run Docker commands. Add your user to the docker group to avoid typing sudo every time:
# Add current user to docker group
sudo usermod -aG docker $USER

# Apply changes (without logout)
newgrp docker

# Verify it works without sudo
docker ps

# Enable Docker at startup (usually already done)
sudo systemctl enable docker
sudo systemctl start docker
sudo systemctl status docker
Essential Docker Commands
Here are the Docker commands you'll use every day in production:
# Container management
docker ps                         # List running containers
docker ps -a                      # All containers (including stopped)
docker run -d -p 8080:80 nginx    # Start nginx in background
docker stop my-container          # Stop a container
docker start my-container         # Start a stopped container
docker restart my-container       # Restart
docker rm my-container            # Remove a stopped container
docker exec -it my-container bash # Interactive shell in container

# Image management
docker images                     # List local images
docker pull nginx:latest          # Download an image
docker rmi nginx:latest           # Remove an image

# Logs and monitoring
docker logs my-container          # Show logs
docker logs -f my-container       # Follow logs in real-time
docker logs --tail 50 my-container
docker stats                      # Real-time CPU/RAM usage
docker inspect my-container       # Full container details
Docker Compose — Multi-Service Orchestration
Docker Compose is the tool for defining and running multiple containers in a single YAML file. It's the foundation of every Docker production deployment.
# Example docker-compose.yml — Web app + database
version: '3.8'

services:
  # Web service
  webapp:
    image: nginx:alpine
    container_name: my-site
    restart: unless-stopped
    ports:
      - "8080:80"           # Generic port — adapt as needed
    volumes:
      - ./html:/usr/share/nginx/html:ro
      - ./nginx.conf:/etc/nginx/conf.d/default.conf:ro
    networks:
      - app-network
    depends_on:
      - database

  # Database
  database:
    image: postgres:16-alpine
    container_name: my-db
    restart: unless-stopped
    environment:
      POSTGRES_DB: mydb
      POSTGRES_USER: myuser
      POSTGRES_PASSWORD: mypassword   # Use .env in production
    volumes:
      - db-data:/var/lib/postgresql/data
    networks:
      - app-network

volumes:
  db-data:

networks:
  app-network:
    driver: bridge
# Essential Docker Compose commands
cd /path/to/docker-compose.yml
docker compose up -d # Start all services in background
docker compose down # Stop and remove containers
docker compose down -v # + remove volumes (WARNING: data lost)
docker compose ps # Service status
docker compose logs -f # Follow all service logs
docker compose logs -f webapp # Logs for specific service
docker compose pull # Update all images
docker compose up -d # Redeploy after pull
docker compose restart webapp # Restart single serviceEnvironment Variables and .env File
Never hardcode passwords in docker-compose.yml. Use a .env file next to docker-compose.yml:
# .env file (NEVER commit to git)
POSTGRES_PASSWORD=MySecurePassword2026
APP_SECRET_KEY=random-secret-key
DOMAIN=myapp.example.com

# In docker-compose.yml, reference with ${VARIABLE}:
environment:
  POSTGRES_PASSWORD: ${POSTGRES_PASSWORD}
  APP_KEY: ${APP_SECRET_KEY}

# Add .env to .gitignore:
echo ".env" >> .gitignore
Docker Volumes — Data Persistence
Docker volumes are essential for your data to survive container restarts or updates. There are two main types:
- Bind mount: links a host folder to the container — e.g., ./data:/var/data
- Named volume: managed by Docker, stored in /var/lib/docker/volumes/
- Bind mounts recommended for: config files, data you want to back up easily
- Named volumes recommended for: databases, large data sets
# Inspect Docker volumes
docker volume ls
docker volume inspect my-volume

# Backup a named volume
docker run --rm   -v my-volume:/data   -v $(pwd):/backup   alpine tar czf /backup/my-volume-$(date +%Y%m%d).tar.gz /data

# Restore a volume
docker run --rm   -v my-volume:/data   -v $(pwd):/backup   alpine tar xzf /backup/my-volume-20260312.tar.gz -C /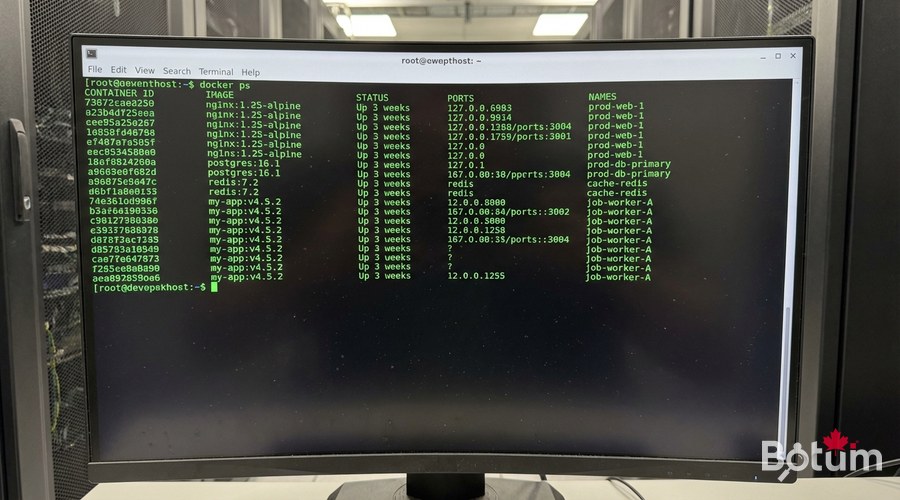
Docker Networks — Container Communication
By default, containers are isolated. For them to communicate, they must be on the same Docker network. The default bridge works for testing, but in production create dedicated networks:
# Create a dedicated network
docker network create my-app-network

# Connect containers to the network
docker network connect my-app-network container1
docker network connect my-app-network container2

# In docker-compose.yml (recommended approach):
# Services in the same compose file see each other by service name
# E.g.: webapp can reach database via http://database:5432

# Inspect networks
docker network ls
docker network inspect my-app-network
Updating Containers in Production
Updating a Docker service takes just a few commands with minimal downtime:
# Standard method with Docker Compose:
cd /path/to/your/app

# Pull new images
docker compose pull

# Redeploy with new images (minimal downtime)
docker compose up -d

# Verify everything is running
docker compose ps
docker compose logs --tail 20

# Clean up old unused images
docker image prune -f
Conclusion and Next Steps
Docker and Docker Compose are now installed and configured on your Ubuntu Server. You have the foundation to deploy any service in this series. In the next article, we install Zoraxy — our SSL reverse proxy that will securely expose these services to the internet.
Téléchargez ce guide en PDF pour le consulter hors ligne.
⬇ Télécharger le guide (PDF)🚀 Aller plus loin avec BOTUM
Ce guide couvre les bases. En production, chaque environnement a ses spécificités. Les équipes BOTUM accompagnent les organisations dans le déploiement, la configuration avancée et la sécurisation de leur infrastructure. Si vous avez un projet, parlons-en.
Discuter de votre projet →