Advanced fail2ban: Custom Jails, Alerts and Multi-Service Protection
Advanced fail2ban guide: custom SSH/Nginx jails, Telegram action, whitelisting. Protect your Linux servers with tailored rules.

fail2ban is probably the most universal Linux security tool there is — it runs on millions of servers. But the majority of admins only use it with the default SSH jail, which represents about 10% of what the tool can do. This guide explores custom jails, multi-channel alerting, complex service protection (MySQL, Postfix, WordPress), and integration with external systems.
How fail2ban Works — A Quick Recap
fail2ban continuously monitors your log files. When it detects a suspicious pattern (X failed attempts in Y seconds), it executes an 'action' — typically adding an iptables rule to block the IP. After a configurable delay, the IP is unblocked. Simple, effective, but powerful when properly configured.
- Filters: regular expressions defining what looks 'suspicious' in logs
- Jails: combination of filter + action + thresholds (maxretry, findtime, bantime)
- Actions: what happens when a pattern is detected (iptables ban, email, webhook...)
- Whitelists: IPs that are never banned (your office, VPN access)
Installation and Basic Configuration
# Ubuntu / Debian
sudo apt update && sudo apt install -y fail2ban

# CentOS / Rocky Linux
sudo dnf install -y fail2ban
sudo systemctl enable --now fail2ban
⚠️ Critical rule: never modify /etc/fail2ban/jail.conf directly. Always create a jail.local file that overrides default values. This way, fail2ban updates won't overwrite your configuration.
sudo cp /etc/fail2ban/jail.conf /etc/fail2ban/jail.local
sudo nano /etc/fail2ban/jail.local
[DEFAULT]
# IPs never banned (YOUR OFFICE IP, VPN network, admin network)
ignoreip = 127.0.0.1/8 ::1 10.0.0.0/8 192.168.0.0/16
# Default ban duration
bantime = 10m
# Progressive banning
bantime.increment = true
bantime.formula = ban.Time * (1<<(ban.Count if ban.Count<20 else 20)) * banFactor
findtime = 10m
maxretry = 5
backend = systemdAdvanced Jails by Service
Enhanced SSH Protection
[sshd]
enabled = true
port = ssh
filter = sshd
logpath = /var/log/auth.log
maxretry = 3
bantime = 1h
findtime = 30m
Nginx Protection — Brute Force + DDoS
[nginx-http-auth]
enabled = true
port = http,https
filter = nginx-http-auth
logpath = /var/log/nginx/error.log
maxretry = 3
bantime = 1h

[nginx-botsearch]
enabled = true
port = http,https
filter = nginx-botsearch
logpath = /var/log/nginx/access.log
maxretry = 2
bantime = 24h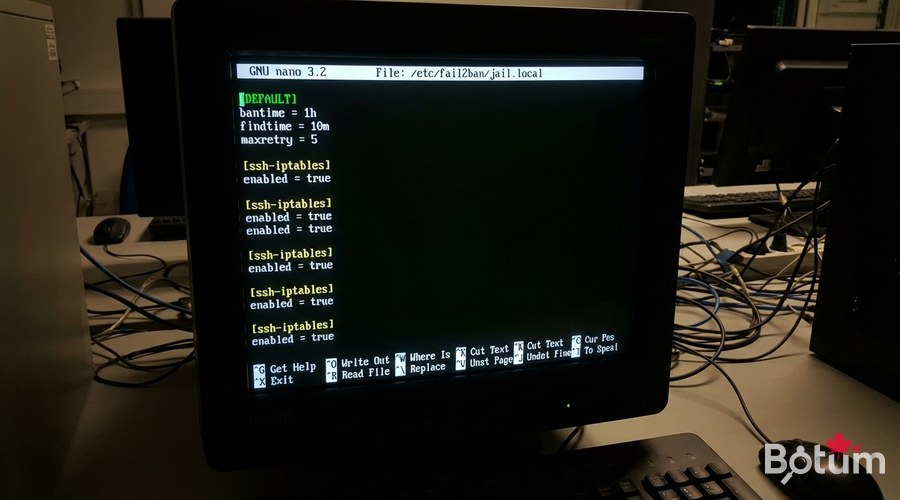
Create a Custom Filter for a Business Application
# Create the filter
sudo nano /etc/fail2ban/filter.d/my-app.conf
# /etc/fail2ban/filter.d/my-app.conf
[Definition]
failregex = ^%(__prefix_line)s\[AUTH FAIL\] .+ from <HOST>$
^%(__prefix_line)s\[LOGIN ERROR\] IP: <HOST> .+$
ignoreregex = ^%(__prefix_line)s\[AUTH FAIL\] .+127\.0\.0\.1.+$# Test the filter before enabling it
sudo fail2ban-regex /var/log/my-app/auth.log /etc/fail2ban/filter.d/my-app.conf
# Expected output:
# Lines: 1243 lines, 0 ignored, 47 matched, 1196 missedAdvanced Actions — Multi-Channel Alerts
Telegram Alerts
# /etc/fail2ban/action.d/telegram.conf
[Definition]
actionban = curl -s -X POST https://api.telegram.org/bot<TOKEN>/sendMessage   -d chat_id=<CHAT_ID>   -d parse_mode=HTML   -d text="🚨 <b>BAN</b>%0AIP: <ip>%0AService: <name>%0AServer: $(hostname)%0ADate: $(date '+%%Y-%%m-%%d %%H:%%M:%%S')"

actionunban = curl -s -X POST https://api.telegram.org/bot<TOKEN>/sendMessage   -d chat_id=<CHAT_ID>   -d text="✅ IP <ip> unbanned (service: <name>)"

[Init]
init = test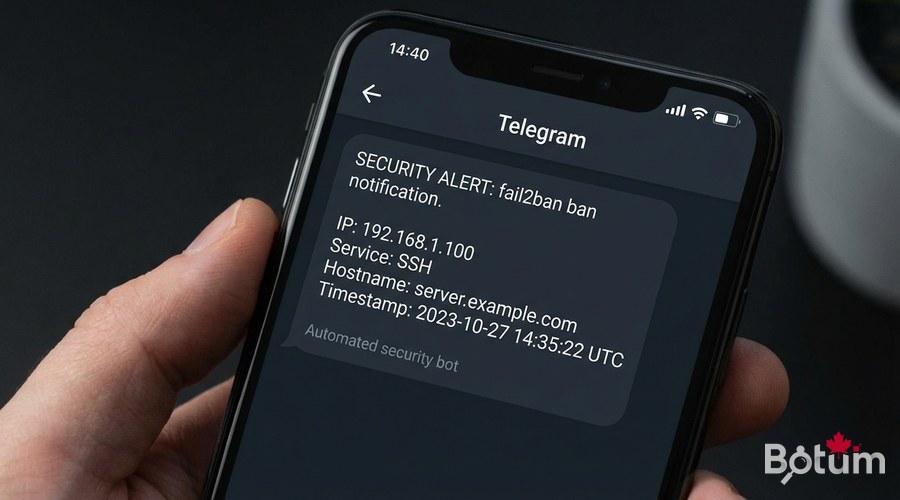
Management and Maintenance
# Status of all jails
sudo fail2ban-client status
# Specific jail status
sudo fail2ban-client status sshd
# Unban an IP (false positive)
sudo fail2ban-client set sshd unbanip 1.2.3.4
# Reload config without restart
sudo fail2ban-client reload
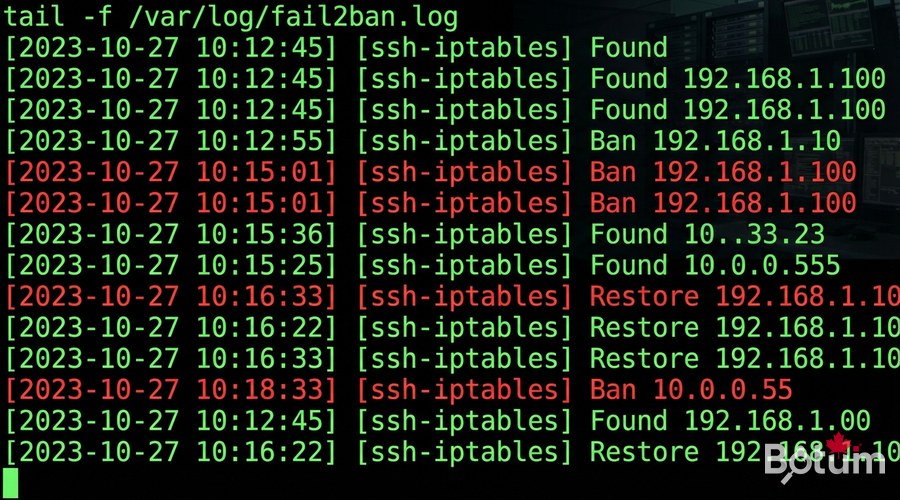
# Real-time logs
sudo tail -f /var/log/fail2ban.log
Daily Report Script
#!/bin/bash
# /usr/local/bin/fail2ban-daily-report.sh
JAILS=$(fail2ban-client status | grep "Jail list" | sed 's/.*Jail list:\s*//' | tr ',' '\n' | tr -d ' ')
REPORT="fail2ban Report $(date +%Y-%m-%d) - Server: $(hostname)"

for jail in $JAILS; do
  COUNT=$(fail2ban-client status "$jail" | grep "Total banned" | awk '{print $NF}')
  CURRENT=$(fail2ban-client status "$jail" | grep "Currently banned" | awk '{print $NF}')
  REPORT="$REPORT\n$jail: ${COUNT} total / ${CURRENT} active"
done

curl -s -X POST https://api.telegram.org/bot<TOKEN>/sendMessage \
  -d chat_id=<CHAT_ID> \
  -d text="$REPORT"
Next Steps
- Migrate to CrowdSec to benefit from community collective intelligence
- Integrate fail2ban with your SIEM (Elasticsearch, Graylog) for event correlation
- Set up dynamic whitelists for your VPN team IPs
- Configure GeoIP-based banning to block high-risk countries
- Automate filter testing in your CI/CD pipeline
Download this guide as a PDF to read offline.
⬇ Download the guide (PDF)🚀 Go Further with BOTUM
This guide covers the essentials. In production, every environment has its own specifics. BOTUM teams accompany organizations through deployment, advanced configuration, and infrastructure hardening. If you have a project, let's talk.
Discuss your project →